Placemat Tutorial
You will need:
4 - 16 1/2" x 12 1/2" pieces of main fabric
4 - 12 1/2" x 4" pieces of coordinating fabric
4 - 20 1/2" x 16 1/2" pieces of interfacing and of backing fabric
50" of trim
Regular sewing supplies.
To begin:

Choose your fabric and cut to size.

If you happen to be using fabric samples as I was, cut of the paper backing.

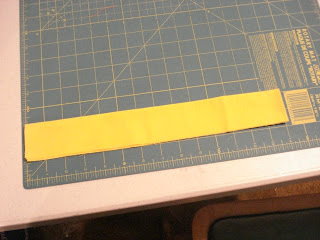
Cut the coordinating fabric.

I waited to cut the backing and the interfacing. I then laid the main fabric on top of the interfacing and backing and used my ruler and cut it 2 inches bigger the whole way around.
(As a note, I had stiffener that I bought at a local upholstery shop and it worked great for interfacing and saves $$$, however you could use any stiff interfacing)

Your stack should look like this.

Zig zag the edge of the coordinating fabric, sewing through all layers.

Next, sew the trim on through all layers.

Take the entire stack to the ironing board, put on some great music or your favorite TV program and iron away! This is actually the part that I like least, hence the music or TV. Iron under 1/2 inch on the top and bottom and then turn up another 3/4" on top and bottom. Do the same on the sides. OK, I don't actually measure this, I eyeball it, depends on how particular you are. Make sure the you give the corners a really good press.


This is what they should all look like at this point.
Now for the fun, mathematical/geometrical part of the lesson.

You are going to open up that corner. See the squares it made when you pressed it?

You are going to fold it back right sides together from the corner to make a 45 degree angle and you will see this square. Yours, of course, will not have this nice pen mark to guide you as mine does. Feel free to get out that pen and draw it in though.

Sew diagonally across that square. Make sure that you knot both ends and don't sew out of the square.

Trim as shown.

Finger press the seam open.
Repeat these steps 15 more times.

Now you should have something that looks like this!

Take them back to the ironing board and turn and press them. This pressing is not as bad as the last one.

Top-stitch the binding down.
Repeat 3 more times.
and.....

Voila! You have a new set of place mats.
These are very easy to make, if you happen to make a set, please send a pic to me, I would love to see them! I actually made this set in 1 1/2 hours.

Comments
You explained everything so well, I may have to try some some day.
Did you notice how well you blog template matches these place mats? I was just mesmerized as I scrolled down. lol.