Blue Jean Table Runner Tutorial

You will need:
Lightweight cardboard
Pen
Scissors
Thread
Old Jeans
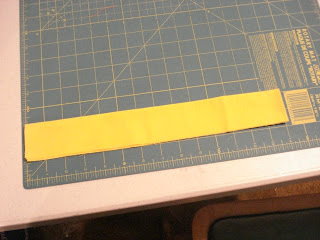
10 squares of contrasting material.
Sewing Machine.
Start with a circle pattern around 7 inches in diameter.
I used one of my small plates and it worked fine.
Cut a cardboard pattern
or just trace around the plate.
You will need 10 of these for the runner.
Trace the circles on the wrong sides of the jeans and cut out.
Hint: I trace a bunch, cut them into smaller pieces and cut them out in the evenings in front of the TV.
Now this part is a little tricky.
You might need some of your high school geometry skills.
You need a pattern for a square that fits inside of your circle and touches all four corners.
I used my ruler for my rotary cutter and laid it down on my circle pattern
and marked the circle pattern.
Mine worked out to five inches.
This is the end of the math, I promise.
If you have a simple graphics program on your computer, you should be able to make a pattern
from that also.
and
if you absolutely cannot figure all this out.
email me and I will send you a file of some patterns.
or
if you can figure it out and just don't want to,
email me anyway
and I will send them to you.
Ok, hardest part done.


I like to have a variety of jeans shades and textures.

After they are cut out,
arrange them into pairs
and trace the square inside one of the circles in each pair.

Pin them right sides together
and sew one edge together
on each pair.


Press open the seams and you should have five pair that look
like this.

The place two pair right sides together and trace a square inside one circle
on one pair so that you have a guideline to go by.
Sew the two pairs together.
You should now have two sets of four
and an extra set of two.

Sew the two sets of four together
and then sew the last set of two onto them.
Press all seams apart
and
you will have
something that looks like this.

Then press in the edges.

I use a little Niagara spray starch to hold them a little better.

Open the flaps and pin the squares inside closing the flaps over top of the fabric.
Back to the machine and zig zag stitch everything.
I find it easier to go down through the center first.
It eliminates a lot of pins and a lot of bulk.

I sew it in this manner,
not so much turning that way.
Here is what the back looks like
at this point.

Zig Zag everything, press it all again,
and you are done!

Just some ideas to think outside the box.
This pillow was made from a pair of khakis.

To match a bedroom.

This is the blanket that I made several years ago.
Don't look too close,
it has been washed and is really starting to fray in some places.

Think tote bags and pillows.
Small t-shirt logos in the middle of the squares.
There are tons of possibilities!
If you make anything from this, I would love to see it.
Send me a pic, leave a comment with the link, etc.

Comments
I save and cut up all of hubbies old jeans. Ive stitched snowmen on them and made ornies for all my kids one year.
Love denim.
Hugs Trace
www.grannytracescrapsandsquares.com
Thanks...
Karen
BTW I got mail today....so cute. Thank you very much.
Les
A little more than I can handle, Lol! Two thing I want to accomplish, learning to sew beyond basic skills and to get better at crocheting!
pillow is so cute and feminine. I love that blanket too. Oh how wonderful it all is. WoW. I love the new header too. -Steph-
JoAnn
sweetpepperrose.blogspot.com
www.facebook.com/PaulasPaintin.Primin
http://mycottagelife.blogspot.com/2012/07/on-table.html
Thanks again!