How to Paint a Message Board - Free Painting Instructions
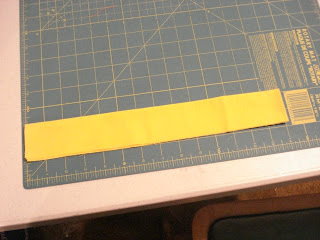
 Supplies needed:
Surface,
(of course I am using up the the 200 doors that are in the cellar)
Refer to this.
Crackle medium of your choice
A candle
A good 1/2 inch flat brush.
Sponge
Chalkboard Paint
DecoArt Americana
Black
Cocoa
Bleached Sand
Heritage Brick
Antique Maroon
Milk Chocolate
Antique Gold
Mustard Seed
Butter
Another version...they all come out different.
 If you have pre-finished doors, sand the areas that you are going to paint.
Paint the frame and the main area black.
(Almost everything I paint starts out black.)
 Decide on the area that you want to be the chalkboard and mark it off.
 For an arch, find the center of your board and mark it.
Fold a piece of paper in half and cut an arch with scissors.
Line up the centers and trace the arch with chalk.

Tape off the straight edges and paint a heavy coat of the chalkboard paint on the marked out area.

Sponge the chalkboard paint.
(I hoard sponges from in jewelry boxes, they are perfect for this sponging and for sponging backgrounds and easily thrown away when you are finished.)
 Now for the crackle and the candle.
First, rub the candle on random patches of the background.
There is no right and wrong way for this, don't overthink it.
Then,
Paint the crackle medium in random patches on the background.
Leave some areas without any treatment.
 Set this aside for the allotted crackle time.
 Take a nap,
paint something else,
prep four more boards,
watch PART of a tv show,
get a coffee,
clean a drawer,
paint your toenails,
call your kids,
Whatever, just don't forget it and let it dry.
With Cocoa and Bleached Sand, paint the background.
With Cocoa and Bleached Sand, paint the background.
Don't overwork this because as you know if you have used crackle before, this can become a bad mess.
Paint it on quickly and don't worry if you miss spots, it is supposed to look primitive.
Let dry and sand. 
The checkers are made with a 1/2 inch flat brush, loaded with Antique Maroon or Heritage Brick or a mix of both if you prefer..or black.

The checkers are made with a 1/2 inch flat brush, loaded with Antique Maroon or Heritage Brick or a mix of both if you prefer..or black.
Really, try different things.
The key here is to thin the paint slightly and use an evenly loaded brush.
I make about five or six checkers and reload.
Once you get on to these, they are so fast.
You will be putting them on everything.

This stencil is from Simply Plaid.
I have worn out two of these already.
You can make your own star and trace it, you can make your own stencil, really they all can be different.

I like these little cosmetic wedges for stenciling.
The frugal (cheap) part of me lets them dry and cuts off the paint and uses them again and again.
Stencil the star with Milk Chocolate.
 Now, not to confuse you, but I switched over to a black background in order to show this better.
After you stencil the star, let it dry and repaint using Milk Chocolate on the left side and Antique Gold on the right.
Pat blend between the two.

With Mustard Seed and Antique Gold brush mixed on your brush,

With Mustard Seed and Antique Gold brush mixed on your brush,
drybrush this onto the right area of the star.

Wipe your brush, Allow this to dry completely and sideload with Milk Chocolate and Antique Maroon and shade the left side of the star.

Ok, back to the original piece.
Paint the berries first with Antique Maroon and then highlight on the right sides with Heritage Brick.

Wipe your brush,
DO NOT DIP IT IN THE WATER!
Pick up Butter and drybrush more on the right.
 Allow this to dry completely and sideload with Milk Chocolate and Antique Maroon and shade the left side of the star.
Ok, back to the original piece.
Are we confused yet?
Paint the vines with a mix of Milk Chocolate and Black.
I use this mixture a lot for Brown.
It makes a nice opaque brown and so much better than what I can find in the bottles.

Paint the berries first with Antique Maroon and then highlight on the right sides with Heritage Brick.
Connect them with Black vines.
 Voila!
 Voila!
 You are done!
How easy was that?
Only varnish the painted areas on this.
Only varnish the painted areas on this.
Do not varnish over the checkerboard paint.
As you see on the one board, I have also painted the frame with Heritage Brick.
Make it your own.
Please don't take this pattern and republish it as your own.
Please send me pics of anything you paint with this pattern.
I would love to see it used!
Feel free to add the link to your blog or website!

Comments
Blessings,
Lorna
I honestly had no idea!
Thanks so much!
Teresa
patti
patti
I am going to follow along
Cathy